what are you looking for?
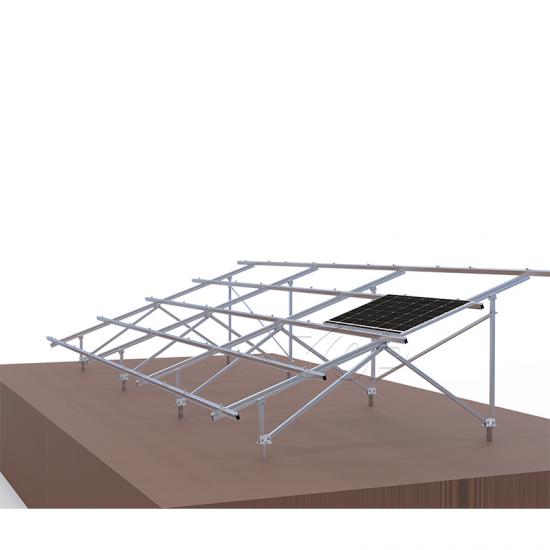


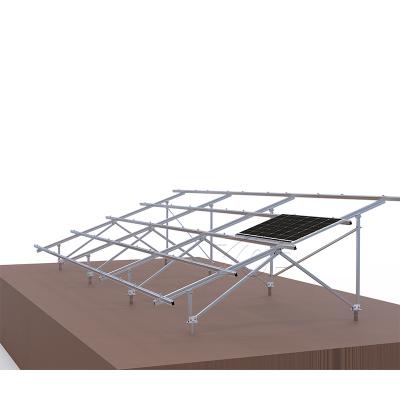


A solar ground mounting system is composed of durable aluminum alloy solar accessories and hot-dip galvanized ground screws, ensuring excellent corrosion resistance and structural stability. This combination provides a lightweight yet robust solution, ideal for long-term outdoor use in various terrains and weather conditions.
Material:
Aluminum Alloy 6005-T5, Q235BSnow Load:
1.4KN/m²Wind Load:
60m/sStandard:
AS/NZS 1170, JIS C8955:2017/GB5009-2012Certification:
CE/SGSPanel Orientation:
Landscape/PortraitWarranty:
10 YearsService Life:
25 Years.Overview
Solar ground mounting system is consists of aluminum alloy solar accessories and hot dipped galvanized ground screws.
The aluminum alloy solar bracket structure is lightweight, corrosion-resistant, beautiful in appearance, and has a service life of more than 25 years.
The ground solar bracket have different types, such as N shape, W shape. And all the solar ground mounting bracket is quick to installation due to the most of brackets are highly pre-assembled.
.Product Details

| Product Name: | Solar Ground Mounting Bracket, Photovoltaic Structure |
| Material: | Aluminum Alloy, Hot Dip Galvanized Steel |
| Module Orientation: | Portrait or Landscape |
| Warranty: | 10 Years |
| Service Life: | 25 Years |
| Certification: | SGS, CE |
| Max Wind Load: | 60 m/s |
| Max Snow Load: | 1.4 KN/M² |
The Characteristics of solar ground mounting bracket:
.The solar structure adopts 100% aluminum alloy Al6005-T5;
.easy to handle, transport and install, high pre-assembly solar bracket;
.The easy-to-maintain structure has a long service life and strong corrosion resistance.
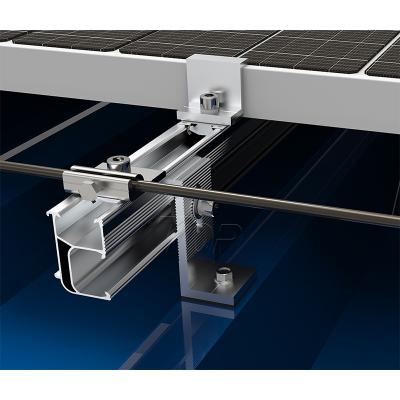
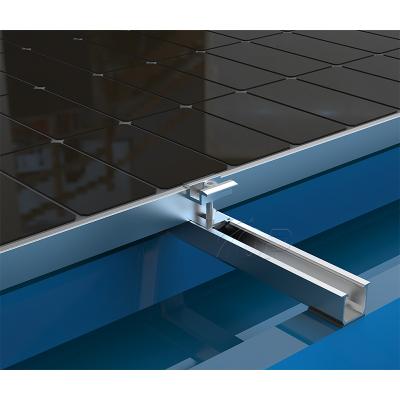
.Installation Effect


Step1: Installation the hot dipped galvanized ground screw on the open ground.
Step2: The solar component base install on the ground screw flange by bolt. The solar base is used as a connection between ground screw pile and solar bracket.
Step3: Open the pre-assembly solar bracket, and that install it on the solar component base by bolt. Solar rail install on the pre-assembly solar bracket by the rail clamp.
Step4: The module clamps are used to lock the solar panels on the solar rails.
Step5: The solar panel is fixed on the solar rails by the module mid clamps and module end clamps.
Step6: Complete the solar panel mounting system installation.
.Projects


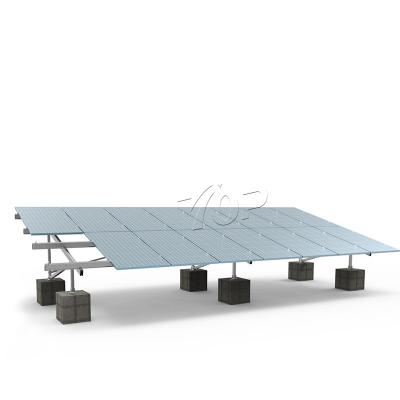
The solar ground mounting structure with a concrete foundation is a highly versatile and durable solution for solar installations. Its robust design ensures stability, adaptability to various terrains, and long-term reliability, making it ideal for both residential and commercial projects.
view more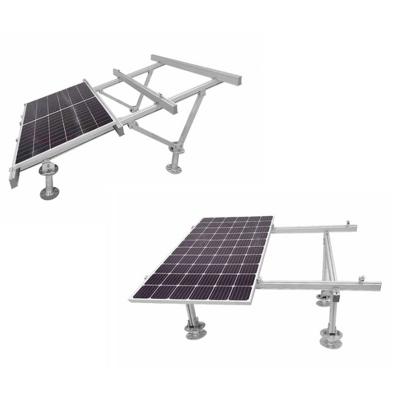
Aluminum alloy ground solar PV mounting systems are highly suitable for large-scale and utility-scale solar PV power plants. Their lightweight yet durable construction ensures excellent corrosion resistance, making them ideal for long-term outdoor use. Additionally, the material's flexibility allows for easy installation and adaptability to various terrains, enhancing efficiency and reducing maintenance costs.
view more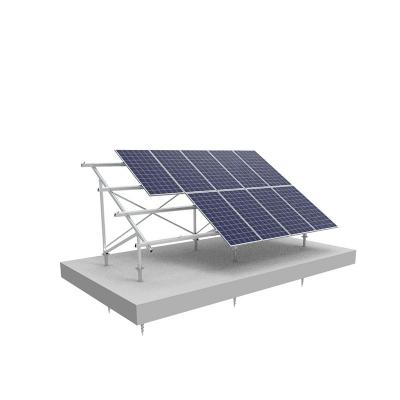
The N-Type Solar Ground Mounting Structure is an efficient, durable, and cost-effective solution for ground-mounted solar energy installations. With its high-quality aluminum alloy material, corrosion resistance, quick installation, and adaptability, this system is ideal for various solar projects worldwide.
view more
The main material of the pv ground mounting system is high-purity aluminum alloy, which is light in weight, pre-assembled components are simple structural design, effectively reducing the onsite cost. Competitive Price Solar Ground Mounting Support Ground Mounting Bracket Solar Mounting System Ground
view more
Ground Mounting System-W Type is typically applied on flat open field ground. The concrete base is easy to build regardless of various soil conditions.ground mounting bracket ground mount solar panel racking systems
view more
The main material of the Solar ground mounting racking is high-purity aluminum alloy, which is light in weight, pre-assembled components are simple structural design, effectively reducing the onsite cost.
view more
The ground mount solar rack is commom aluminum alloy structure and the most porpular ground mount solar solutions, we use the pre-assembly bracket that can save installation time. the ground mount solar system is high anti-corrosion material.
view more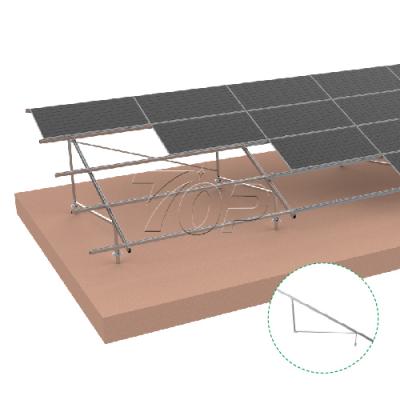
Product Description As the most popular mounting solution in the world, Aluminum ground mount racking systems can be installed at the perfect angle and orientation to maximize sunlight capture. We offer highly pre-assembled components to save loading space and simplify the installation on site. Foundation Options: Ground Screws or Concrete Foundation Designs: N-type, W-type, V-type, and VI-type supports to meet varying load requirements. Technical Parameters Install Site: Open Terrain Module Orientation: Portrait or Landscape Wind Speed: 60m/s Snow Load: 1.4kn/m2 Certification: ISO9001/CE/SGS/TUV Material: Aluminum 6005-T5, Stainless Steel 304/410 Surface Treatment: Anodized Warranty: 15 Years Duration: 25 Years
view more
 Xiamen TopFence Co.,Ltd.


 No. 77, LingXia South Road, Huli District, Xiamen City, Fujian, China
 Tel: +8613365923720
 Email: info@xmtopfence.com
 IPv6 network supported Sitemap
| XML
| Blog
| Privacy Policy
IPv6 network supported Sitemap
| XML
| Blog
| Privacy Policy